This will be the first of a series of articles discussing video surveillance equipment. For this article, we will begin with the basics of an Internet Protocol (IP) video surveillance system. This article will discuss what comprises a basic IP video surveillance system and the basic component choices that determine the video output.
For this article, I have decided to obtain product from a single equipment manufacturer, Merit LILIN Corp. They manufacture a range of video surveillance components including megapixel video cameras, switches, network video recorders and recording software. Working with a single manufacturer insures the components are compatible with each other and technical support provides assistance with one telephone call.
For our purposes, a basic IP video surveillance system is comprised of an NVR (Network Video Recorder), a PoE switch, IP cameras and Ethernet cabling (preferably CAT 6 cable). To setup and customize the system and view the video output, a monitor is necessary.
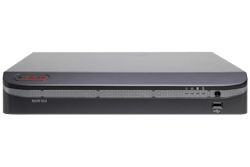
For our basic system, LILIN recommended using the 1080P Real-time Multi-touch 4-Channel Standalone NVR Touch, part number NVR104. This video recorder supports up to full 1920x1080 HD resolution. Additional resolutions supported include 720P, D1 and VGA. The NVR104 has the capacity for up to four channels of real-time recording with up to 24Mbps (Megabits per second) throughput. The recording time is configurable using schedule, manual, motion detection and external alarm. The software that operates each LILIN NVR supports a touch screen display, eliminating the need for a mouse or other input device.
For the purpose of this article, I was provided with two two-megapixel IP cameras whose resolution is 1080P, the High Definition (HD) standard. The LILIN LD6122EX3.6 is a Day & Night 1080P Vandal-Resistant Dome IP Camera and is equipped with a 1/2.5” CMOS image sensor. This Vari-focal lens focal length is adjustable from 3.3-12mm, which is the distance between the lens and the image sensor. A Vari-focal lens has added flexibility able to adjust the width and depth of the captured scene.
This camera’s minimum color illumination is 0.25 Lux at an F-stop of F1.4. For our purposes, a 0.25 Lux is barely equal to the amount of light put out by a full moon on a clouded night. This is the amount of illumination required for the camera to capture color images. The LD6122 camera’s maximum video resolution is 1920 x 1080 (1080P) at up to 15fps (frames per second). The camera housing is rated for outdoor and indoor applications.
The LD2222 1080P HD Dome IP Camera has a fixed lens focal length of 4mm from the 1/2.5” CMOS image sensor. The focal length indicates the angle of view or how much of the scene will be captured. The smaller the number, the wider the image will be. The larger the number, the narrower the angle of view will be. This camera has a very wide angle of view.
The LD2222 camera lens aperture opening is an F1.6. This camera requires a minimum of one Lux to record up to 15fps at 1080P. For our purposes, a one Lux is equal to the amount of light put out by a full moon on a clear night. The camera housing is rated for indoor applications.
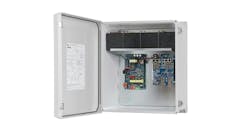
The Eight-Port PoE+ Fast Ethernet Switch (30W/port), part number PMH-POE08260WAT, provides Power over Ethernet (PoE) at 30 watts for each of the eight Gigabit uplink ports. This switch provides power to each camera. There are two combo Gigabit UTP port/SFP to transfer the video from the cameras into the NVR. The Gigabit (1000-Megabits per second) speed capability is required to transfer large files.
CAT 5e cables connect the cameras to the switch and the switch to the NVR. The CAT 5e cable is the standardized cable for Gigabit Ethernet performance. The maximum allowed length for CAT 5e cable is approximately 300 feet.
For the purpose of this first article, we decided upon a tabletop installation. To setup the video surveillance system, the individual components must first be wired.
Important: No component should be powered until all of the components are connected.
To connect the LD6122 camera to the switch, the dome must be removed in order to connect a CAT 5e cable. The dome is secured using four hex head screws that are loosened using the provided hex wrench. The LD2222 has a pigtail that extends from the dome with both an RJ-45 and DC12V connector.
The CAT 5e cables are plugged into one of the eight connectors in the front of the switch. A CAT 5e cable connects the switch to the NVR using one of the two combo Gigabit UTP ports.
For this installation, an HP Touch Screen Monitor was connected to the NVR. When connecting a monitor to the NVR104, the connection is a standard HDMI port. Some monitors do not have an HDMI port and an adapter cable is required. Many newer monitors have a DVI port. Use an HDMI to DVI cable to connect the monitor to the NVR.
Once all of the components have been connected, power the system.
Depending upon the number of cameras, an image may appear from each of the cameras on the screen. If not, LILIN has a WS-Discovery feature that finds and identifies each of the cameras. For this article, only one camera provided a live image. In addition, four shortcut symbol keys appear in the top left corner of the display. They are a gear that indicates the menu, two vertical bars that indicate pause, a dome that indicates the alarm and a downward arrow in a circle that indicates backup.
Use the touch screen and select the gear. This will bring the main menu horizontally across the middle of the screen. There are nine main menu keys. Because only one camera’s image appeared, we need to discover the second camera before setting the addresses. Press the Configuration Menu, which is also a gear.
On the left side of the Configuration Menu screen is a list with Camera at the top with the Camera window to the right. Scroll down to the “WS-Discovery.” Press the Enter button to the right. Depress the IP SCAN button to search for available cameras. The second camera’s image appeared on the screen.
In the next article, we will continue our discussion of the recording features of the NVR104.


