The Kwikset Home Connect 620: An Evaluation
Electronic door hardware continues to evolve. The Home Connect 620 is the latest offering from Kwikset. The lock features Z-Wave technology, which allows for pairing with other smart-home devices. The deadbolt also can work as a stand-alone unit.
Introduction
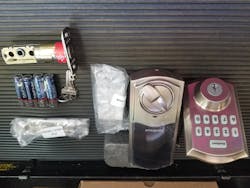
The mechanics will be familiar to those who have worked with Kwikset electronics. The adjustable deadbolt is tapered, and the lock exterior features SmartKey technology (KW1 keyway only) along with a silicone button pad that has LED illumination for easy identification. (Image 1)
A newer feature found on the Home Connect 620 not found on older Kwikset electronic locks is a silicone gasket on the back side of the exterior front component. (Image 2) The gasket acts as a weather seal and has cutouts for the connecting wire and mounting screws. A drawback of the gasket is that the part makes installation of the lock exterior difficult, because the piece must be adjusted slightly to fit a standard 2-1/8-inch hole required for installation. After the gasket was pushed upward into the bottom of the mounting hole, the lock face fit snug, which allowed installation to continue.
Installers also will notice the Z-Wave sticker at the top of the interior unit. It contains a Quick Response (QR) code and PIN necessary to link the lock to other Z-Wave smart-home devices. (Image 5) The same sticker also is on the exterior of the box. The battery pack can be installed after the installation of all interior components. (Image 6)
Programming
Before programming can begin, the lock will run through a series of self-test operations to verify all parts work correctly. If the tests show no errors in operation, the LED indicator on the lock interior will flash green. If problems are identified, the LED will display an orange color, and troubleshooting will be necessary before programming can continue.
The addition of the lock into a pre-existing smart-home system took a few minutes but worked smoothly after the process was completed. Installers will notice two programming buttons on the lock interior. (Image 5) The smaller button marked “A” is used for Z-Wave programming, while the larger unmarked button is used for stand-alone programming.
To program a stand-alone user code, instructions are in the user guide or can be accessible by looking on the back of the plastic cover (Image 7), which fits on the top interior of the metal lock housing. Simply press the larger unmarked button one time, then enter the desired user code. Next, press the Kwikset button on the lock exterior (Image 8) one time to complete the process. The LED indicators on the lock face will flash green to indicate successful programming.
With the lock ready now ready for use, the lock's internal motor was found to be louder than other similar products on the market. The lock also makes a slight snapping noise when the lock or unlock process is completed. However, operation from both sides was found to be smooth. Overall, the lock is well-built and provides many upgrades not found in other Kwikset products.
Herman Manzanares III, RL, is co-owner of Los Alamos Lock & Key in Los Alamos, New Mexico. He has 25 years of locksmith experience. He can be reached via the web at www.losalamoslock.com.
Herman Manzanares III, RL
Herman Manzanares III, RL, is co-owner of Los Alamos Lock & Key in Los Alamos, New Mexico. He has more than 25 years of locksmith experience. He can be reached via the web at www.losalamoslock.com.


