The Smart Way To ReKey SmartKey™ Locks: Lockmasters’ New Decoding Tool
Kwikset introduced the SmartKey™ system, which is also sold under the Weiser name, in 2007 during the flap about bump keys. They even advertise the SmartKey system as being bump-proof, and I’m inclined to believe them. The design of the SmartKey system also makes it extremely pick resistant. I’ve certainly never successfully picked one, and I don’t personally know anyone who has.
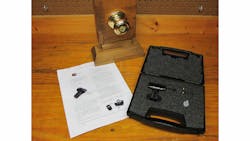
The pick resistant nature of these locks poses a problem when the owners have either locked themselves out or lost the keys. The system is designed to be quickly rekeyed, by the user if necessary, BUT rekeying the lock requires a working key. If there is no working key available and no other point of entry, most locksmiths are forced to destroy the lock. Lockmasters, Inc. has recently introduced a precision tool (Lockmasters P/N LKMKSD) designed to solve this problem by allowing the locksmith to decode the lock and make a new key without removing the lock from the door or having to pick the lock.
SmartKey Operation
In order to understand how the decoding tool works, you must first understand how the Kwikset / Weiser SmartKey system works. The SmartKey system was designed so that a user could quickly and easy rekey the lock without hiring a professional locksmith. I suspect that this feature was designed more to allow the homeowner, or a hardware store, to key a new lock to an existing key than for the homeowner to change his own locks in the event of a lost or stolen key. The system was designed around the existing Kwikset depth and space system.
In order to be compatible with the existing systems, each of the five tumblers inside the lock had to be able to accept any of the depths in the system. To satisfy that requirement, Kwikset came up with a sidebar lock system that uses five pin-tumblers that are connected to five individual sliders that interact with a sidebar. During the rekeying procedure, the sliders can be disconnected from the pin-tumblers so that the old key can be removed and a new key inserted. Once the sliders are re-connected to the pin-tumblers, the new key cuts will be the only ones that will operate the lock.
Let’s take a close look at the construction of a SmartKey lock. In photo 3, you can see the plug of a SmartKey lock removed from the lock housing. In this photo, the sidebar module has been removed so that you can see the five individual pin-tumblers. Notice the projections on each pin-tumbler that extend through the slots in the housing. In operation, these projections engage with the sliders, raising and lowering them to match the cuts in the key. Later, you will see how the SmartKey Decoder Tool uses these slots to decode the lock. Also notice the rekeying lugs cast into the plug below, and slightly offset from the slots. These lugs hold the individual sliders in place during the Rekeying operation. (The white plastic spring-retainer is bowed up in the center in this photo, but it would not be able to that inside the lock because of the surrounding lock housing.)
Photo 4 shows an extreme close-up view of an individual pin-tumbler. Notice that the pin itself is hollow to accept the spring and keep it captive during the rekeying procedure. Also notice the chisel-pointed projection from the side of the pin-tumbler. This projection rides up and down in the slot in the plug and is the connecting point between the tumbler and the slider. When the lock is rekeyed, this projection is disengaged from the slider, which allows the pin to move freely as the old key is removed and the new key inserted.
Photo 5 shows a single slider removed from the lock. This tiny part is the heart of the system and like the pin-tumblers, there are four more of these in the lock and they are all identical. As shown, there are six notches that the projection on the matching pin-tumbler can lock into ,depending on the depth of the key cut. On the opposite side of the slider, there is a sidebar notch that engages the sidebar. When all of the sliders are lined up properly by the key, the sidebar drops into this notch. If the sliders are not properly aligned, the sidebar cannot drop in, and the lock cannot turn. The false notches help to prevent picking, and the rekeying notch engages the Rekeying lugs in the lock plug to hold the sliders in position during the rekeying procedure.
Photo 6 shows one side of the sidebar module with the five individual sliders in place. This side of the sidebar module fits against the lock plug so that the sliders are engaged with the pin-tumblers. The rekeying slot engages with the rekeying lugs in the plug, and the rekeying spring maintains pressure on the sidebar module during normal operation. Part of the sidebar is also visible through the slot in the center of the module. When all of the sliders are properly aligned, the sidebar will drop into the sidebar notches in the sliders, allowing the lock to turn.
Now that we understand the various parts of the lock, let’s see how they work together during the rekeying procedure. Once the correct key has been inserted into the lock and the plug has been rotated clockwise 90 degrees (so that the rekeying slot is at the top of the plug), the lock is ready to be rekeyed.
The rekeying tool (Photo 7) is inserted into the slot in the face of the plug and pushed in hard. You will feel, and sometimes hear, a click as the sidebar module is pushed back against the pressure of the rekeying spring. At this point, the individual sliders will be disengaged from the pin-tumblers and held in place by the rekeying lugs. The rekeying tool can be removed as soon as you feel the sidebar module snap into the rekeying position.
The key is then removed from the lock while it remains in the turned position, and the new key is inserted fully. (It is very important to make sure that the key is fully inserted into the lock.) Once the new key is in position, the lock is then turned with the key counter-clockwise 90 degrees back to the key-pull position, but the key is NOT removed. To test that the lock has been properly rekeyed, turn the plug back clockwise so that the rekey slot is at the top of the plug, and attempt to pull the key out of the lock. If the key cannot be pulled out of the lock, then the procedure was done correctly. If the key pulls out, something has gone wrong, and you will have to repeat the rekeying procedure.
Decoding Tool Operation
Now that we understand how the lock is built, we can learn how to use the Lockmasters SmartKey Decoding tool. The tool consists of a battery powered high-intensity LED scope with a precision machined key-probe firmly attached to the front of the scope. The probe is made from a Kwikset key that has been machined so that it will lift all of the pin-tumblers as far as possible and still allow you to look down the keyway with the scope. The focal length of the magnifying eyepiece of the scope is set so that you can easily focus on the tiny mirror that is positioned at a 45-degree angle at the end of the slot in the key-probe. The scope functions like a periscope, and by looking into the mirror with the scope, you will actually be looking at a 90-degree angle from the keyway. This will allow you to look through the slots in the side of the plug, and see the individual sliders. Once you learn what to look for, you can quickly determine the depth of each cut in the key, so that you can cut a working key for the lock from code.
The mirror is positioned on the key-probe so that you will automatically be looking at the slot for the fifth cut when the key-probe is inserted all of the way into the lock. Once you have determined the depth of the fifth cut, you will then pull the tool out of the lock slightly until you have located the slot for the fourth cut. After determining the depth of that cut you will repeat the procedure for the remaining cuts in the key, until you have decoded the entire lock. It should then be a simple matter to cut a key from code and unlock the door. At that point you can rekey the lock or do anything else that needs to be done.
The trick is to accurately read the sliders through the scope. While this should be easy in theory, it defiantly requires practice. The instructions provided with the tool are excellent and they also recommend that you obtain a SmartKey lock to practice on and spend as much time as necessary decoding it until you become proficient. I would add that you should a test key to the following cuts: 6 – 5 – 4 – 3 - 2, and reset the lock to that key. In that way you can easily see the difference between each cut in series.
Photos 12 through 17 show you the portion of the slider that will be visible through the slot for each depth. Remember as you look at these photos that you will only be able to see the edge of the slider. The most easily confused depths are number 3 and 6 depths. In the number three depth, all you will see is the blank edge of the slider below the notches. In the number six depth, all you will see is the rekeying notch. If you look closely though, you should be able to see the sloped edges of the rekeying notch in the number 6 depth.
Photographing the actual image that can be seen through the tool is more than a little difficult, but photos 18 through 20 show three different views. Photo 18 shows the number 1 depth; photo 19 shows the number 3 depth, and photo 20 shows the number 5 depth. What you cannot see in the photos is how it actually looks to a human eye. By moving your head slightly as you look through the scope, you can see variations in perspective that make the depths much easier to read than these photos indicate. But, this tool absolutely requires practice in order to be able to use it. However, that practice will pay off quickly, if you work with these locks on a regular basis. If so, you really should consider the new SmartKey Decoder from Lockmasters, Inc.


