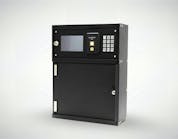
Drilling a door to run wires for electronic access control can be a delicate process. Using the Bulls-I door coring tool (Photo 1) makes the job easier and more accurate.
At the beginning of this installation, the Bulls-I door coring jig is mounted on the door (Photo 2). We will start by measuring how far back we want this to sit in order to get a nice, straight hole.
You want to use a measuring tape and a little bit of painters’ tape (Photo 3). The painters’ tape is going to do two things. First, it's going to make sure that your measurement is equal and straight across the door from the beginning of the hole to the end of the hole. Second, it's going to determine a position where you can drill into that hole to counter and intersect it so that you can begin to get the wire out of the hole and transfer it where it needs to go. (Photo 4.)
Always double-check the measurements before starting any drilling or cutting. We measured it first with just the painters’ tape and we're going to double-check those measurements after we get it in place.
Photo 5 shows John Nolan with Reliant Security clamping the Bulls-I jig into place.
You'll notice that there's a nice little piece of foam in between the door and the jig (Photo 6). That's going to help protect the door. We always use painters’ tape and foam to protect the door.
Now both clamps are in place (Photo 7) and this door is ready to be cored.
Notice that instead of across the 36 inches of width, we're actually coring it down from the top of the door down to about the middle of the door where we have the good zone to mount hardware between the 36- and 48-inch mark on the door itself. (Photo 8)
In photo 9, Nolan is showing how the long drill bit is going to reach directly at the hinge pocket. We're going to intersect this hole directly at the hinge pocket. Photo 10 shows how everything is set up before we start coring.
Next, Nolan is using the 24-inch drill bit that is supplied to begin the whole drilling process. (Photo 11)
The Bulls-I comes with two drill bits. You start off with the shorter one because it's easier to control and it's going to spread the load between two drill bits instead of just one.
Photo 12 shows Nolan using the second drill bit. This is the longer drill bit that's actually going to reach all the way from the top of the door down to the middle of the door. We could even drill a little bit further down the door if we wanted to.
In Photo 13, Nolan has that long drill bit sunk all the way to the hinge pocket. We mark off with a little piece of tape directly on the drill bit where that point is going to be (Photo 14). Now you can see that shiny bit at the top of the hole. That is where our drill bit intersected (Photo 15).
We're dead square on at the beginning hole, so that measurement puts a square centered on that hole in that tunnel. You can see that in two different locations.
You sometimes have to go hunting for the other hole, which is the one that's down by the hinge towards the end of the tunnel path. It is about an inch off (Photo 16). That's going to be completely covered up by the exit device, so it's not going to harm anything or be a problem.
The Bulls-I products used was the 300 3PCT-300/PDH300.
Watch the video at https://youtu.be/jWXoKWFY4AE. For more video reviews, check out wayne'slockshop.com.
Wayne Winton
Wayne Winton is the owner of Tri-County Locksmith Services, located in Glenwood Springs, Colorado.


