One of the jobs of the Joint Committee on Accreditation of Healthcare Organizations (JHACO) is to audit hospitals throughout the United States to ensure they are in compliance. One of their concerns is how narcotics, pharmaceuticals, "sharps" (needles/scalpels), etc., are secured in rooms, refrigerators, carts or cabinets. However, JHACO does not specify how to secure the containers of these compounds.
For example, under Security of Medication, effective August 3, 2005, under the Frequently Asked Questions web page of the JHACO web site, the following two questions are answered and I quote:
"Q: How does Joint Commission define "secure" in relation to medication stored in the pharmacy, patient units, operating rooms, and crash carts? A: Stock medications stored in the Pharmacy and in patient care areas must be either locked or under constant surveillance. The same holds true for the operating room including anesthesia carts - when an anesthesia cart is unattended and not under constant surveillance, it must be locked or stored in a locked room. The same requirement applies to floor medication carts and crash carts and any prepackaged surgical or treatment packs that may contain medication."
Under Bedside Medications, also effective August 3, 2005, "Q: Can medications for patient self-administration be stored at the patient's bedside? A: Yes, but only if the medication is stored under lock and key or secured in a way to assure that the patient and authorized staff can access the medication but others cannot."
JHACO may not specify how to secure; however, the group has teeth. A hospital can be cited for not locking up or for not having access control. No one other than an authorized individual should have access to a narcotics cabinet. If the facility does not resolve a situation in a timely fashion, it could lose accreditation or even federal funding.
For more information, visit the web site http://www.
jointcommission.org/.
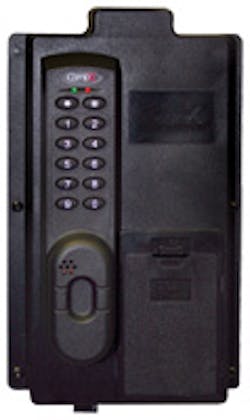
The CompX eLock Refrigerator Kit is designed to secure refrigerators and freezers in order to keep medications, chemicals and dangerous substances out of the hands of the unauthorized. The eLock Refrigerator Kit has a battery-operated electromechanical lock with a motor-driven spring bolt latch. Five lock models are available.
The Refrigerator Kit eLock has non-volatile memory with the capability of up to 250 Supervisor/User Codes. The eLock Refrigerator Kit provides a method for controlling access and with the available option of audit trail to provide some accountability as the downloaded information can identify a user or specific day/time, if an infraction has occurred.
The eLock Refrigerator Kit is mounted onto the door and the strike is mounted onto the top of the refrigerator body. As the door is closed and the strike enters the slot leading to the eLock latch, the latch retracts to accommodate the strike and extends into the opening in the strike. The door is locked, and only a properly programmed P.I.N., magstripe card, or proximity ID can gain access. When a properly programmed P.I.N., card, or ID has been entered, the electric motor retracts the latch and the door can be opened.
Note: Do not pull on the door until the sound of the motor stops.
The eLock Refrigerator Kit slam latch is designed to lock the refrigerator simply by closing the door. The eLock Refrigerator Kit is designed for interior applications and is not weather resistant.
The sample Refrigerator Kit is equipped with the proximity/keypad eLock. For this eLock and the two other models equipped with a keypad, eLocks can be programmed by either adding codes using the keypad or using the optional LockView™ software. The keypad of the sample Refrigerator Kit eLock has a green LED and red LED, an asterisk "*" key, and pound "#" key. In addition, there are two rows of five buttons, numbering 1 through 0. When a valid code is entered, the green LED illuminates, the latch retracts, and there is a positive confirmation beep. If an invalid code is entered, the red LED illuminates, and there is a negative beep.
LockView, a Windows™ based software, provides basic programming functions for non-keypad equipped eLocks. In addition, all models of the eLock can be programmed for time and weekly programming and have audit capabilities. The LockView software provides adding, editing, deleting, and assigning access rights for eLocks, users and supervisors. Using LockView, the audit log contains up to the last 1,500 entry attempts with date, time, access granted or denied, and user name.
The five lock models of the Refrigerator Kit have an RJ-11 port that can be accessed without opening the refrigerator door.
Depending upon the configuration of the refrigerator, the eLock can be installed using screws or double-sided tape. The double-sided tape is the type used by vehicle manufacturers to attach emblems onto the body.
Note: Determine the location of the cooling coils prior to drilling any holes.
I was invited to observe this installation of the CompX eLock installed onto a refrigerator using the double-sided tape to initially secure the strike onto the top of the refrigerator body. The facility mandated that no holes be drilled into the body of the refrigerator. Since there are no refrigerant coils in the door of the refrigerator, holes could be drilled and the eLock body could be secured using tamper resistant Torx T-15 screws.
The eLock was installed onto the center of the refrigerator door. The reason was the door to the refrigerator was curved from the center to the sides and was originally equipped with a lock in the center of the door that no longer operated. To fill the gap caused by the curvature of the door, flat washers were added behind each mounting screw hole.
Step 1. Measure two inches beneath each side top mounting hole on the eLock. This provides a better location for the top two mounting screws.
Step 2. Drill a 1/8" diameter hole through on each side.
Step 3. Enlarge the four remaining mounting holes to 1/8" diameter.
Step 4. Remove anything on the surface of the refrigerator door and top. Clean the surface.
Step 5. Use a level to properly position the eLock body onto the door of the refrigerator. Note: Level the refrigerator prior to leveling the eLock.
Step 6. Measure the top of the refrigerator and draw a centerline.
Step 7. Position the strike along the centerline with the tip pointing up.
Step 8. With the strike held in place on top of the refrigerator, place the eLock body onto the door, engaging the strike.
Step 9. Use a pencil to mark the location for the strike.
Step 10. Cut off a piece of the double-sided tape, the same length as the strike that will be positioned on top of the refrigerator body.
Step 11. Remove the backing from one side of the tape.
Step 12. Position the tape onto the refrigerator within the drawn lines. Press down hard to ensure good adhesion.
Step 13. Remove the backing from the other side of the tape.
Step 14. Place the strike onto the tape and press down hard to ensure good adhesion.
Step 15. With the strike attached to the top of the refrigerator, place the eLock body onto the door, engaging the strike.
Step 16. Remove the battery compartment cover and install the six AA batteries.
Step 17. Follow the getting started instructions, input a four-digit minimum Personal Identification Number, and test the operation of the eLock. See programming instructions towards the end of this article.
Step 18. Adjust the eLock as necessary make certain the latch retracts and engages the strike.
Step 19. When proper positioned, mark the location for the six mounting screws.
Step 20. Drill the six 1/8" diameter holes just through the sheet metal of the door.
Step 21. Mount the eLock body using the supplied security Torx screws. Test the operation of the eLock.
Step 22. Mount the cover onto the strike and secure with the two provided screws. The cover must be installed as the lock can be easily opened without the cover being attached.
The next series of steps is to program the eLock for Supervisors and Users. For this installation at this time, only one code was programmed.
PROGRAMMING
The CompX eLock Refrigerator Kit does not have any programmed Supervisor or User codes. To program the eLock Refrigerator Lock from the keypad, using the following:
To start, program a Supervisor P.I.N., four digits minimum, into the eLock.
Step 1. Press and hold the "#" key until the beeping stops.
Step 2. Input a P.I.N. and press the "#" key. This P.I.N. is supervisor in slot #001.
Once a Supervisor code has been added, the keypad eLock can be programmed at lock or programmed using the LockView software. To program at the eLock Refrigerator at the lock, continue with the following:
Adding a User Code:
Step 1. Input the Supervisor P.I.N. and press "#" key.
Step 2. Press and hold the "#" key again until beeping stops.
Step 3. Input new User P.I.N. and press "#" key.
Adding a Supervisor Code:
Step 1. Input the Supervisor P.I.N. and press "#" key.
Step 2. Press and hold the "#" key until beeping stops.
Step 3. Press and hold the "#" key again until beeping stops.
Step 4. Input new Supervisor P.I.N. and press "#" key.
Note: Pressing the "#" key a second time until the beeping stops makes the user a Supervisor.
Deleting a User or Supervisor P.I.N.:
Step 1. Input a Supervisor P.I.N. and press "#" key.
Step 2. Press and hold the "*" key until beeping stops.
Step 3. Input the User/Supervisor P.I.N. and press "#" key.
Adding a User code to a specific slot assignment:
Step 1. Input a Supervisor P.I.N. and press "#" key.
Step 2. Press and hold the "#" key again until beeping stops.
Step 3. Enter slot number that will be assigned to the User and press "#". For example, for slot number 10, enter 010"#".
Step 4. Input new User P.I.N. and press "#" key.
Deleting a User with a specific slot assignment:
Step 1. Input a Supervisor P.I.N. and press "#" key.
Step 2. Press and hold the "*" key until beeping stops.
Step 3. Enter the slot number to be cleared and press "#". For example, for slot number 10, enter 010"#".
Step 4. Enter the slot number to be cleared again and press "#".
To change functions, add time and week calendar and audit trail capability, the eLock must be programmed using the LockView software. The software provides step-by-step instructions for programming the eLock.
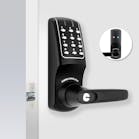
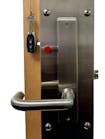
Five eLock models are available for the Refrigerator Kit: numeric keypad, magstripe, magstripe/keypad, proximity, and proximity/keypad.
Six "AA" batteries power the eLock Refrigerator Kit and latch, which is sufficient power for approximately one year of normal operation.
For more information, contact your local locksmith wholesaler or CompX Security Products, P. O. Box 200, Mauldin, SC 29662. Telephone: 864-297-6655. Web site: www.compx.com.
Additional supplies used: four flat washers
Time To Install: 1/4 to 3/4 hour
Special Tools: Level, razor knife, mineral spirits to clean refrigerator
Warranty: One year from date of purchase


