In this installation, we’re going to be looking at an alternative to square-hole drilling for an indicator lock. An International open lock indicator will be installed on a narrow stile storefront door with an Adams Rite deadbolt.
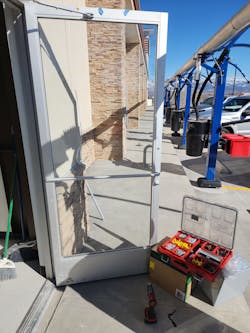
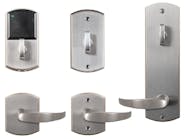
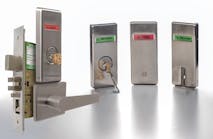
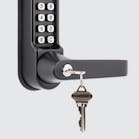
Photo 1 shows the opening right before work begins. Photo 2 shows the open locked indicator in the open position. There’s a thumbturn on the inside and when the lock is unlocked, the bolt is down and it says unlocked. Photo 3 shows it in the locked position, with the bolt extended.
I brought along my 18-volt drill along with my Milwaukee Packout system that is packed full of storefront parts, especially GKL products -- bridges and screws and cover plates and all kinds of fun stuff that you need to service this. I have this entire kit prepackaged with my hole saw. (Photo 4)
I install these a little differently than most locksmiths. The instructions say to drill two small holes at two locations. I prefer to do it my way, which is with the hole saw and it only requires one hole.
The first step is taking the screws out of the coverplate. (Photo 5) Next we review these measurements, as furnished by the manufacturer. (Photo 6).
I start with the bottom-hole measurement and the top-hole measurement and I determine those from the center of the housing. In Photo 7, you can see where the tape measure is positioned.
Next, I make a mark where that first screw needs to go or where the bottom screw needs to go, and then I’ll doublecheck my measurements. Then I’ll make sure that we have the correct backset.
Photo 8 shows that we’re sitting at inch and an eighth for backset. You can see that my original dot was over just a little bit. All of this will be covered up by the open locked indicator. Now we’re in the correct backset for it as well.
Next, I’ll use the actual open locked indicator. I’ll set it right up on the spots I marked for the screw to get the location of my top hole. (Photo 9) I’ll make sure that my math adds up to what the actual open locked indicator actually requires.
Now that we have the top and bottom hole marked, it’s time to measure the center hole (Photo 10). We basically take the difference between the top and bottom, figure out the middle and centerpunch the middle, making sure again that backset is sitting at right at an inch and an eighth.
If your holes tend to start wandering, your installation will look crooked and less professional and it will not function as well.
After the center hole is punched, I use a one-inch metal or bi-metal hole saw that will cut through the aluminum. (Photo 11) It’s vital to have some kind of backing plate that you slip in between the door and your drill bit. (Photo 12) If you drill too far, you risk drilling into the locking mechanism and there’s a significant chance that you could ruin it.
I keep a stainless steel door wrap on the truck for this purpose. The drill bit went right into that protective wrap as opposed to going into the lock housing or the lock mechanism. (Photo 13)
If you bang up the track, the pin won’t slide very well and it’ll cause problems. I use a knife to cut off all of the loose ends and basically smooth that hole out so the plastic pieces do not get caught on anything.
Next, we pre-drill the two mounting screw holes. I use a regular HSS high speed steel drill bit. You could leave the protector behind there or carefully watch it. (Photo 14)
After pre-drilling the hole, I use an 8 by 32-thread Milwaukee drill tap to tap the threads for the mounting holes. This tool has metric and standard SAE threads. (Photo 15)
I’ll then run the screw into the hole to make sure that it fits and is properly threaded. (Photo 16)
Photo 17 shows the two 4:50 screws and the two little bars that come in the open lock indicator kit. We will be using the smooth flat bar and the two installation screws for this particular installation.
Photo 18 shows that the bar that slides up and down the deadbolt in the open position. Photo 19 shows it in the locked position. You can see the amount of travel that that bar has and that the deadbolt is now extended.
Take a look at the top of the door. (Photo 20) One of the requirements that will probably be made by the fire department and/or the customer is to have proper signage that says “these doors are to remain unlocked while building is occupied” or during business hours. That’s the basic gist of it; if this building is occupied, this door needs to be unlocked.
After the installation is completed, make sure that the indicator actually says “locked,” the bolt is actually extended and your indicator is centered both vertically and horizontally.
Photo 21 is the completed opening from the outside. Never mount an open locked indicator on the outside. You would be causing major security flaws. Photo 22 shows the finished project with the cover plate back on. Note that you could add a key block on the inside if the fire department requires it.
For more information, check out Wayne’slockshop.com and lockreference.com.
Wayne Winton is the owner of Tri-Count y Locksmith Services, located in Glenwood Springs, Colorado.
Tools used:
Bi-metal hole saw
18-volt drill
Milwaukee Packout system filled with GKL storefront parts
Tape measure
Stainless steel door wrap
8 by 32-thread Milwaukee drill tap
Wayne Winton
Wayne Winton is the owner of Tri-County Locksmith Services, located in Glenwood Springs, Colorado.


