I've done a lot of work on gun safes lately. One day I had the privilege of working on two safes by the same name– Executive Vault. These “vaults” are gun safes by Cannon Safe, Inc.
Opening & Repairing 2007 Model
My job on the first of these Executive Vaults was to open it and replace the malfunctioning Sargent & Greenleaf Z02 RotaryBolt lock. The keypad responded to each button press by beeping as usual, but when the proper combination was entered, the solenoid did not click. This is known to happen when the boltwork is resting against the lockbolt. I rotated the three-spoke handle in the closing direction (clockwise) to ensure that the bolt carriage was not in contact with the lockbolt, then tried the combination again. Still the same. I connected a new keypad with a new Duracell alkaline battery and tried again, but the outcome was no different.
Cannon had given me the management reset code that should reset the lock's combination to 123456#. I used the code, but the lock did not give the confirmation beeps that I expected to hear afterward. I concluded that the logic in the lock's electronics was, for some reason, not functioning properly.
Considering this problem to be beyond my ability to correct while the safe is locked, I moved on to opening the safe through frontal penetration. (I'm not entirely satisfied that there was no way to make this lock work. Some people are better at electronic diagnostics than I am.)
I decided to drill for the lock's solenoid. To determine the location of the solenoid, it was necessary to ascertain the orientation of the lock itself. Looking through the safe's cable hole, I could see a 1/8” hole in the lock case. Within the lock, this little hole is located where a typical mechanical safe lock would have its dial spindle. I could also see that the cable inside the safe was routed leftward from the cable hole. Based on this, I knew that the lock was mounted in the standard position with the lockbolt pointing downward. This means the solenoid is horizontally oriented, with its centerline about 11/16” below the center of the cable hole.
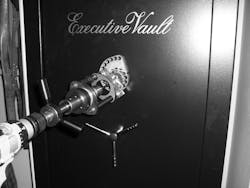
Note that the safe had four screw holes for keypad mounting but that only the top and bottom ones were tapped. Since my chosen drill point was very close to the bottom hole, I tapped the left and right screw holes and fastened my Helix drill template using those holes instead. (It had to be done this way in order to prevent drilling a hole through the template's base plate.) Then I mounted my Magnum Bullet II drill rig, as shown in Figure 1, and drilled the hole seen in Figures 2 and 3. (The mild steel, hardplate, and zamac were all penetrated with a single 5/16” StrongArm bit.) With a small flat-head screwdriver, I easily slid the solenoid plunger to the right, unblocking the lockbolt. I rotated the three-spoke handle counter-clockwise to retract the boltwork. The safe was unlocked.
The door was a little difficult to open. As it turns out, it had been this way ever since the owner acquired the safe. I initially thought that the door needed some kind of adjustment, but I soon found the culprit. At the bottom of the door, the left half of a door seal strip was out of place, as seen in Figure 4.
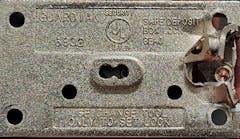
I repaired the hole I had drilled in the door of the safe, installed a new lock and keypad, and moved the door seal strip to where it belongs, as in Figure 5. The safe now works beautifully, but I'd like to know more about the cause of the lock failure. As seen on the label at the edge of the door (Figure 6), this safe was made in the 4th quarter of 2007.
Note that the panel of sheetrock on the back of the door has a hole for a change key. It's not applicable to this lock, but it could potentially be used for scoping the change-key hole of a mechanical combination lock. This hole in the panel is filled with a plastic plug that was somewhat difficult to remove.
Lock Replacement, 2004 Model
About three hours later, I arrived at a second Executive Vault. My job on this one was to replace a malfunctioning Kaba Mas LC lock and MX keypad. The safe was open and its owner had a new S&G Z02 lock and keypad for me to install, which he had received from Cannon Safe.
The hardplate was right up against the safe door's outer layer, so the mounting screws had to be shortened. This would not have been on a problem on the previous safe, which had a lot of empty space behind the door's outer layer.
There were four mounting holes in the safe for mounting the lock, but only three were used for the original Kaba lock –the bottom two and the top left. To mount the new S&G lock, I needed the bottom two and the top right. Cannon only taps the holes that they need, so the threads had not yet been cut in the top right hole. So I tapped the hole, then installed the lock.
Next, I installed the relocker detent plate. The spacing of the screw holes to which it mounted on the original Kaba lock is wider than the spacing of the screw holes on the cover of the S&G lock. To accommodate this change, I drilled a new hole in the relocker detent plate. I then installed the plate to restrain the relock plunger until a burglar comes along. I found, however, that the C-clip on this spring-loaded plunger was binding on the lock case. This rendered the relock device ineffective, so I rotated the clip until the bind was resolved.
The completed installation can be seen from the outside and inside of the safe door in Figures 7 and 8, respectively. This safe is very similar to the previous one and has exactly the same boltwork arrangement, but it has a five-spoke handle. Note that the panel on the inside of this safe's door lacks a change-key hole.
The S&G Z02 RotaryBolt lock, the relock device, and the heart of the boltwork are shown in Figure 9. In Figure 10, the label on the edge of the door shows that this safe was made in the 2nd quarter of 2004.
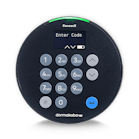
When I was done, the safe's owner offered to give me the malfunctioning lock, so I took it with me, planning to use it for some safebusting practice. Back at home, I discovered that the problem was in the keypad (shown in Figure 11). The LED was constantly lit up green because one of the LED wires was grounded through contact with the keypad housing, as seen in Figure 12. The keypad still responded to button presses, but the lock didn't unlock. I bent the wire away from the housing, resolving the malfunction. If I see this behavior on a locked safe, I'll check the keypad LED. Proper diagnosis of this problem may save me the trouble of unnecessary drilling some day.
FMI
For more information on Cannon Safes, call 800-242-1055 or visit www.cannonsafe.com.
For more information on Sargent & Greenleaf safe locks, call 800-826-7652 or visit www.sargentandgreenleaf.com.
To read additional Locksmith Ledger articles on safeopening, visit http://tinyurl.com/safe0812.


